Wednesday, September 19, 2018

Blur as Art!

One of my favorite things to do with photography is to make pieces of art. You know, images that I wouldn't mind looking at on a regular basis and hopefully images that others would want to look at on a regular basis who would be willing to but them from me. That hasn't happened yet, lol.

One technique that I like to use is blur or blurring the image. Basically, it's intentionally moving the camera to blur your image. Now it sounds really simple but it is quite a bit harder to do than one would realize. One of the things that you have to be sure to do is to pick the proper subject matter. Bright scenes with a lot of color tend to work well. Once you have found the scene you want to use, the next step is to photograph the scene normal, so you can have a reference point later.

Once you have your scene picked set your camera to a normal setting then begin shooting the scene while moving your camera in small circles or up and down, left or right or whatever way you feel gives you the best result. Since you are using a digital camera it doesn't matter how many attempts you make. If you aren't getting the result you want try setting your camera to Shutter Priority and using different shutter speeds until you find the setting that gives you the result you are trying to achieve. 

As I said earlier, this sounds very simple but it can be very challenging, so don't give up if you don't get a good result quickly. It may take you a few attempts and some patience to get a good image. 

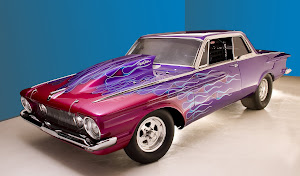
Below is a sample of one of my favorite "Blur as Art" images that I have created.


Sunday, September 16, 2018

Depth Of Field Part 2

So last week I gave you a quick tutorial on what Depth of Field is. This week I want to go into more detail as to how the different settings you choose will affect the depth of field you see in your images.

Things that affect your depth of field are:

Aperture, focal distance (how close you are to your subject) and the focal length of your lens.

Lets imagine you are shooting a landscape photo of the mountain lake. You are trying to get the entire scene you see before you in a photo. The idea is to have the entire image in focus from the closest piece of grass to the trees in the distance across the lake. You want the entire scene in focus from side to side and top to bottom. So how do you do it?


Well lets start with a wide angle lens 18mm to 20mm would be good or a zoom lens that starts small around 18mm. If you don't have a wide angle lens just use the smallest lens you have. Just remember the smaller the lens (i.e. 10mm to 18mm) the more of the scene you can capture in a photo. There are ways to use a larger lens and then stitch the photos together in photoshop and create the scene from multiple images, but that is perhaps another post.


Now that we have a lens lets think about the settings you are going to use on your camera. I like to shoot in one of the manual modes for landscapes I almost always use Aperture priority but straight up manual mode will work just as good. For todays post lets say we are using Manual mode. In manual mode we will have to know how to read the meter in the camera to determine if we are getting a good exposure or not. It's no use to take the shot if you are over or under exposing the image. The goal is to get an image that you can actually see the lake scene. Too much light and the image will be washed out (overexposed) not enough and it will be dark (underexposed).


Lets start with our Aperture setting, some of the aperture settings you will see when you look through your camera could be 2.8, 4, 5.6, 8, 11, 16, 22, 32 you could see different numbers depending on your lens and your camera body. For a landscape image where you want a large depth of field you want to be around 16 at least if not more. Always remember the bigger the number the more depth of field. The problem is the bigger the number also means the iris in the camera is getting smaller. This in turn means you will need more light to get a good exposure. I recommend that you pick the aperture you want, lets say 22 is our target aperture. Depending on the light we are working with we may or may not need a tripod to get the desired image.


Set your aperture setting to 22 then looking through the camera while facing the scene you are trying to capture, adjust the shutter speed until your meter is telling you that you have a good exposure. If you are at 1/60 or higher then you should be able to hand hold the camera and get the image you want. If it goes to 1/30 or lower you should use a tripod or set the camera on something stable and use your timer trigger to get your image. Other wise things may be slightly out of sharpness due to camera movement.


If you have done everything correctly your image should look something like this one.


Keep in mind that this post is for the novice who doesn't own a light meter and maybe doesn't own a tripod, so I am keeping the jargon to a minimum. However, if you are reading this and you don't have a camera that can be set to manual mode this was a huge waste of your time. You can try setting your camera to the setting that looks like a mountain scene on the dial and see if that works for you but I can't promise you'll get the same results. 


Tuesday, September 4, 2018

Photography tips for the beginner!

Lets talk a bit about a term that photographers use that you may not have heard or may not understand, "Depth of Field."

First lets talk about what depth of field is.  Depth of field is referring to how much of your photo is going to be in focus or out of focus depending on your use of depth of field. Lets look at it in a layman's way of thinking about it. Lets say our image is taken from a window looking outside, if everything in the photo is clear and in focus you have a DEEP depth of field. If the flower just outside the window is in focus and the tree 25' away in the image is also in focus that is a deep depth of field. If you were to shoot the same image with a shallow depth of field then maybe just the flower or just the tree is in focus and everything else is out of focus then you have a SHALLOW depth of field.

There are three major things that you affect or change your depth of field, Aperture, focal distance (how close you are to your subject) and the focal length of your lens. All 3 of these affect the depth of field in an image in similar but slightly different ways. I will explain these three in another post starting with Aperture.

Below is an example of how Aperture affects depth of field. Notice the rocks in the foreground, in the top photo the rocks are not in focus but in the bottom photo the rocks are in focus. Each of these images were taken with a different Aperture setting but I will explain this in a future post.


Photography Tips

Earthbound Light - Nature Photography from the Pacific Northwest and beyond by Bob Johnson

My favorite photographers in no special order.

  • Walker Evans
  • Todd Kuhns
  • Earl Pitman
  • Elliott Erwitt
  • Evelyn Cameron
  • Ansel Adams

My Favorite Authors in no specific order

  • Terry Goodkind
  • Corrie tenBoom
  • Christopher Paolini
  • Marcus Mullins
  • Frank Peretti
  • J.R.R. Tolkein
  • C.S. Lewis

My favorite books in no specific order

  • The Prayer of Jabez
  • Soda Pop
  • Peter's Wagon
  • Look, Theres a mouse in our house
  • Pippa Mouses House
  • The Hiding Place
  • The Inheretance Series (Eragon, Eldest, ?)
  • the Bible
  • Photographing Montana
  • The Chronicles of Narnia series
  • The Lord of the Rings trilogy
  • The Hobbit

Gary's Book Wish List

  • Silence and Solitude by Tom Murphy

What color of socks are more comfortable?

Welcome to Gary's Photo Blog

This is just a little hobby I have started. It is my goal to make a new post each day. Please feel free to sign up as a follower of this blog just below this message. Please check back often to see what I have added.

Thanks for visiting,

Gary - A.K.A. - Photoman

Friends of this blog

Abstract Art

Abstract Art
Clam bake

Muscle Car Madness

Muscle Car Madness
Majenta Fire